How to use x86_64 packages in Conda on M1 Mac
By Dmitry Kabanov
If you work on an M1 Mac computer (that is, on an Apple computer with
an ARM processor)
and use Conda
to manage Python environments and packages,
sometimes you need to work with packages that are available
only for x86_64 architecture, that is, for Macs with Intel processors
(x86_64 is a common name for 64-bit Intel processors).
For example, I ran into this problem when I wanted to go through
SnakeMake tutorial,
and it turned out that many bioinformatics tools (needed for the tutorial)
are not available for the M1 architecture.
To work with x86_64 packages in Conda, you need to have the following:
- run a terminal in Rosetta mode
- tell Conda about the package architecture it must use.
So, the first step is to switch a terminal to Rosetta mode.
Rosetta mode is macOS’ compatibility layer
for software written for Intel processors.
As I would like to use the terminal most of the time in native M1 mode,
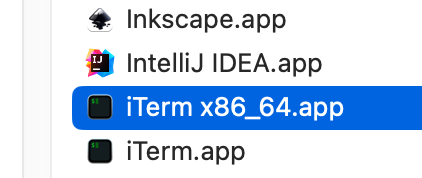
I open the /Applications directory in Finder and copy the terminal app:

I use iTerm2 as my default terminal, so I name the copy iTerm x86_64.
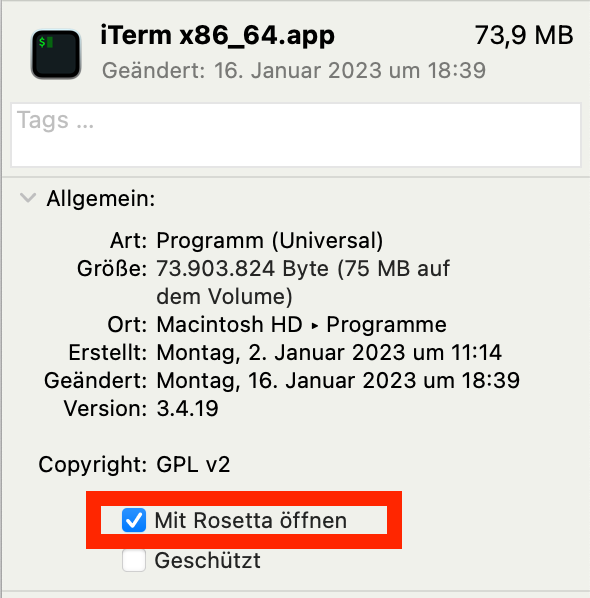
Now open “Get info” window for the app
and check the “Open with Rosetta” checkbox,
so that this copy of the terminal always opens in compability mode:

Now when you need to work in a Conda environment with x86_64 packages,
use this copy of the terminal app.
However, it is not enough to work with Conda environments.
When you install Conda packages, you need to specify the required architecture
using the environment variable CONDA_SUBDIR:
CONDA_SUBDIR=osx-64 conda env create -f environment.yaml
as you can see from the above command where I create a Conda environment
from file environment.yaml and specify osx-64 as the package architecture
(osx-64 is the Conda way of defining Intel macOS package architecture;
the M1 packages are denoted osx-arm64).
I hope this post is useful for you!